Thursday, April 7, 2011

2 Tomato Salads

Here are two of our favorite summer salads. Nothing beats bright, fresh, ripe tomatoes, and once you start pairing those with the tang of viniger and the crunch of cucumber. It's over!

Tomato, Mozzarella and Basil Salad with Balsamic Glaze


Prep Time: 5 minutes
Serves: 6

Ingredients:


1 or 2 large beefsteak tomato
1 pint cherry tomatoes
1 ball fresh mozzarella cheese
Fresh basil (about 5 leaves)
Balsamic reduction glaze
Sea salt

Directions:


1. Cut the beefsteak tomatoes and fresh mozzarella cheese into six ½" thick slices. Cut the cherry tomatoes in half.

2. Place the tomato slices around a plate, and top each one with a slice of cheese then toss on the cherry tomatoes. Tear the fresh basil into small, bite size pieces, and sprinkle over the tomatoes and cheese. Drizzle on the blasamic glaze and sprinkle lightly with fresh ground sea salt.

Enjoy!

NOTE: I'm lucky here in Canada because our grocery gain (Loblaws) carries a store brand PC balsamic glaze that's fantastic. If you're not so lucky to find one to keep on hand in the fridge, don't fret because it's a BREEZE to make yourself. Here's how:


Balsamic Glaze Recipe

Prep Time: 1 minute
Cook Time: 15-20 minutes, give or take
Makes: ¼ - ½ cup of glaze

Ingredients:

1 cup balsamic viniger
1 tbsp honey (or white sugar, or brown sugar)

Directions:


1. In a sauce pan over medium heat combine viniger and sweetener. Boil over medium heat until reduced by 50 to 75%.

This is delicious over meat, salads, and even ice cream.


Tomato and Cucumber Salad


Prep Time: 5 minutes
Serves: 6

Ingredients:


1 large beefsteak tomato
1 pint cherry tomatoes
1 cucumber
White vintager
salt

Directions:


1. Cut the large tomato and cucumber into bit size pieces, cut the cherry tomatoes in half.

2. Put all pieces in a glass bowl (never metal, it will end up tasting tinny). Add white vinegar (about ½ a cup) and salt (about 1½ tbsp). Toss together and taste, adjusting your flavoring as needed.

Tuesday, March 29, 2011

Chicken with 40 Cloves

Chicken with 40 Cloves 


This is one of Bo and my favorite "nice" dinners. By "nice" I mean better then meatloaf and not cooked often enough. Really though, it's so easy to make, and now that I've figured out a version with chicken pieces as an alternative to a whole chicken when you're in a bit more of a rush? Well, it's pure gold! Keep this is the back of your mind for company too, it looks quite impressive with no effort past the initial 10 minutes on the stove top!

Also, do NOT be scared by the name, even if you're not a garlic person. The flavor added to the chicken is so mild and delicate because the garlic turns sweet from slow roasting in the braising liquid.

Prep Time: 20 minutes
Cook Time: 1hour 10 minutes (chicken pieces) or 1 hour 40 minutes (whole chicken)
Serves: 4

Ingredients:


1 whole chicken (whole, or cut into 8 pieces. you can also just buy chicken thighs or breasts, bone-in, skin on)
4 large garlic heads worth of cloves, peeled (this will net you around 40 cloves)
2 tbsp butter
1 tbsp olive oil
¼ cup chicken stock (sub water if you don't have stock on hand)
1 tbsp lemon juice
2 large sprigs of fresh thyme
salt
pepper

Directions:


Pre-heat your oven to 350°F and generously sprinkle your chicken with salt and pepper on all sides.


In a dutch oven over medium-high heat melt the butter together with the olive oil until searing hot. Add your chicken and brown on all sides (about 3 minutes per side). Remove chicken to a plate.

 
Drain all but 1 tbsp of accumulated liquid from the pan, then add garlic cloves and cook for a couple of minutes, until starting to become fragrant but not browning.


Turn off the heat and add your chicken back to the pot, on top of the garlic. Pour the chicken stock and lemon juice evenly over the top of the chicken, then add the thyme sprigs. Cover with the lid and bake until the thickest part of the thigh registers 180°F (a whole chicken will take about 90 minutes, chicken pieces about 45 minutes).


Let the chicken rest on a plate for ten minutes, tented in foil, before carving.

Enjoy!


Note: Do not throw out the garlic from the bottom of the pan after cooking. If you do this I will have to come to your house and call you nuts! Slice up and lightly toast a baguette, then spread the soft, sweet roasted garlic cloves on it. Or, mash some up and make a quick vinaigrette out of it. Or, mash some up and mix with some extra virgin olive oil, grated Parmesan cheese, a splash of balsamic vinegar, salt and Italian seasoning, then dip some bread in it. Your options are endless.

The only option I won't let you have is to throw it out!

Saturday, February 12, 2011

Puffy Oven Pancakes

Puffy Oven Pancakes 
(aka Dutch Babies... you can't make that kinda thing up!)


This is absolutly one of my favorite breakfasts to make.

It's Oliver approved too, always a bonus!

Plus, there are a bunch of different variations you can make on it. Here we go:

Prep Time: 5 minutes
Bake Time: 20 minutes
Serves: 2

Ingredients:

2 eggs
½ c milk
½ c flour
dash of cinnimon
dash of nutmeg
3 tbsp butter, cold
1 tbsp brown sugar (optional)
pinch of cinnamon (optional)

Directions:

1. Preheat your oven to 425°F. Place 2 tbsp cold butter into a glass pie dish, and place in the oven to heat while you make the batter (about 5 minutes, until the butter is melted and some brown bits appear). In a small bowl, mix together brown sugar and cinnamon, set aside.


2. Beat the eggs, milk, flour, cinnamon and nutmeg together until smooth. Pour the mixture into the heated pie dish. Some of the butter will end up on top. This is glorious, don't worry! (Note: I doubled the recipe, that's why there are two pie plates)


3. Bake for 8 minutes, then remove from the oven and sprinkle with cinnamon and sugar mixture. Place 1 tbsp butter in the center of the pancake, and return to the oven for another 8 to 10 minutes.


Enjoy!
NOTE: When cooked, the center will be a little custard-y, that's exactly what you're looking for!
VARIATIONS: There are a bunch of variations you can do here, basically anything you can think of. Here are a few of my favorites though:

1. Toss apple or pear slices in the sugar mixture and place on the pancake (either at the start to bake it, they just won't puff up, or after 8 minutes).

2. Top with Jam at the 8 minute mark

3. Bake plain, the spread a little bit of dulche de leche and some banana slices on top. Mmmmmm


Wednesday, February 9, 2011

Ugh.

I have been just so, so sick this week. I came down with something Friday night, and it's just gotten worse, so nothing's been updated.

(sorry)

I do have a couple waiting in the wings though, and I'll get them up as soon as I can say supercalafragalisticexpialadoshus without starting a coughing fit.

I'm hoping tomorrow?

Get ready for a 5 minute, 4 ingredient, pineapple cream pie, corn flake cookies, and how I make Ragu a little more fun with just a few quick additions.

For now: back to bed!

Then to the doctors.

Then to the other doctors.

Then to garbage night.

Crap, I totally forgot that it was garbage night. Help me.

If you're bored, make the chocolate sheet cake that I got from The Pioneer Woman, it'll change your life!

Or the butter tarts, they're faster and ohhhhhh so good!

Thursday, February 3, 2011

Show Stopper Roast Chicken


I call this my show stopper because is tastes like I put hours of planning and effort into figuring out the perfect combination of accouterments to highlight the bird, when really, I got lucky about 5 years ago on my first shot and haven't looked back. Sure, I've tried variations, but I always come back to this.

Unless it's summer time.

Then it's all about the beer can.

Or the rotisserie!

Did I mention that this is a breeze to pull together too?

No?

It's a breeze to pull together!

Show Stopper Roast Chicken

Prep Time: 10 minutes
Bake Time: 2 hours +/-
Serves: 4, but they'll fight over it

Ingredients:


1 lemon, sliced into ¼" rounds
8-10 sprigs fresh rosemary (just buy a pack at the store and use it up)
1 medium sweet onion, sliced in half, then each half into 4 chunks
6 tbsp butter, softened
garlic powder
salt
pepper
olive oil

Spice Rub:
1 tsp salt
½ tsp pepper
½ tsp garlic powder
1 tsp paprika
½ tsp old bay seasoning


Directions:


1. Preheat your oven to 350°F and mix together your spice rub.

2. Rinse your chicken, then pat dry with paper towels. Sprinkle the cavity of the bird liberally with salt, pepper and garlic powder. Stuff the cavity with 1 tbsp of butter, 3 sprigs of rosemary, and some lemon slices and onion chunks (roughly 2 of each).

3. Loosen the skin from the breast meat and the legs. Rub ½ tbsp of butter under the skin of each leg, and 1 tbsp of butter under the skin of each breast. Rub the remaining two tbsp of butter all over the outside of the skin. Finally, rub the spice rub over the buttered skin. Yumm.

4. Place the remaining onion chunks, lemon slices, and rosemary sprigs around the perimeter of your roasting pan. Place the chicken, breast side up, onto a roasting rack in the pan. Sprinkle a bit of kosher or fresh ground sea salt over the top of the chicken.


5. Bake at 350°F until the thickest part of the breast registers 180°F on a thermometer. Half way through baking (1 hour in), drizzle some olive oil over the top of the chicken (1-2 tbsp). Be sure to let the chicken rest for 15 minutes before carving or else the meat will lose its juices and you'll be eating dry bird.

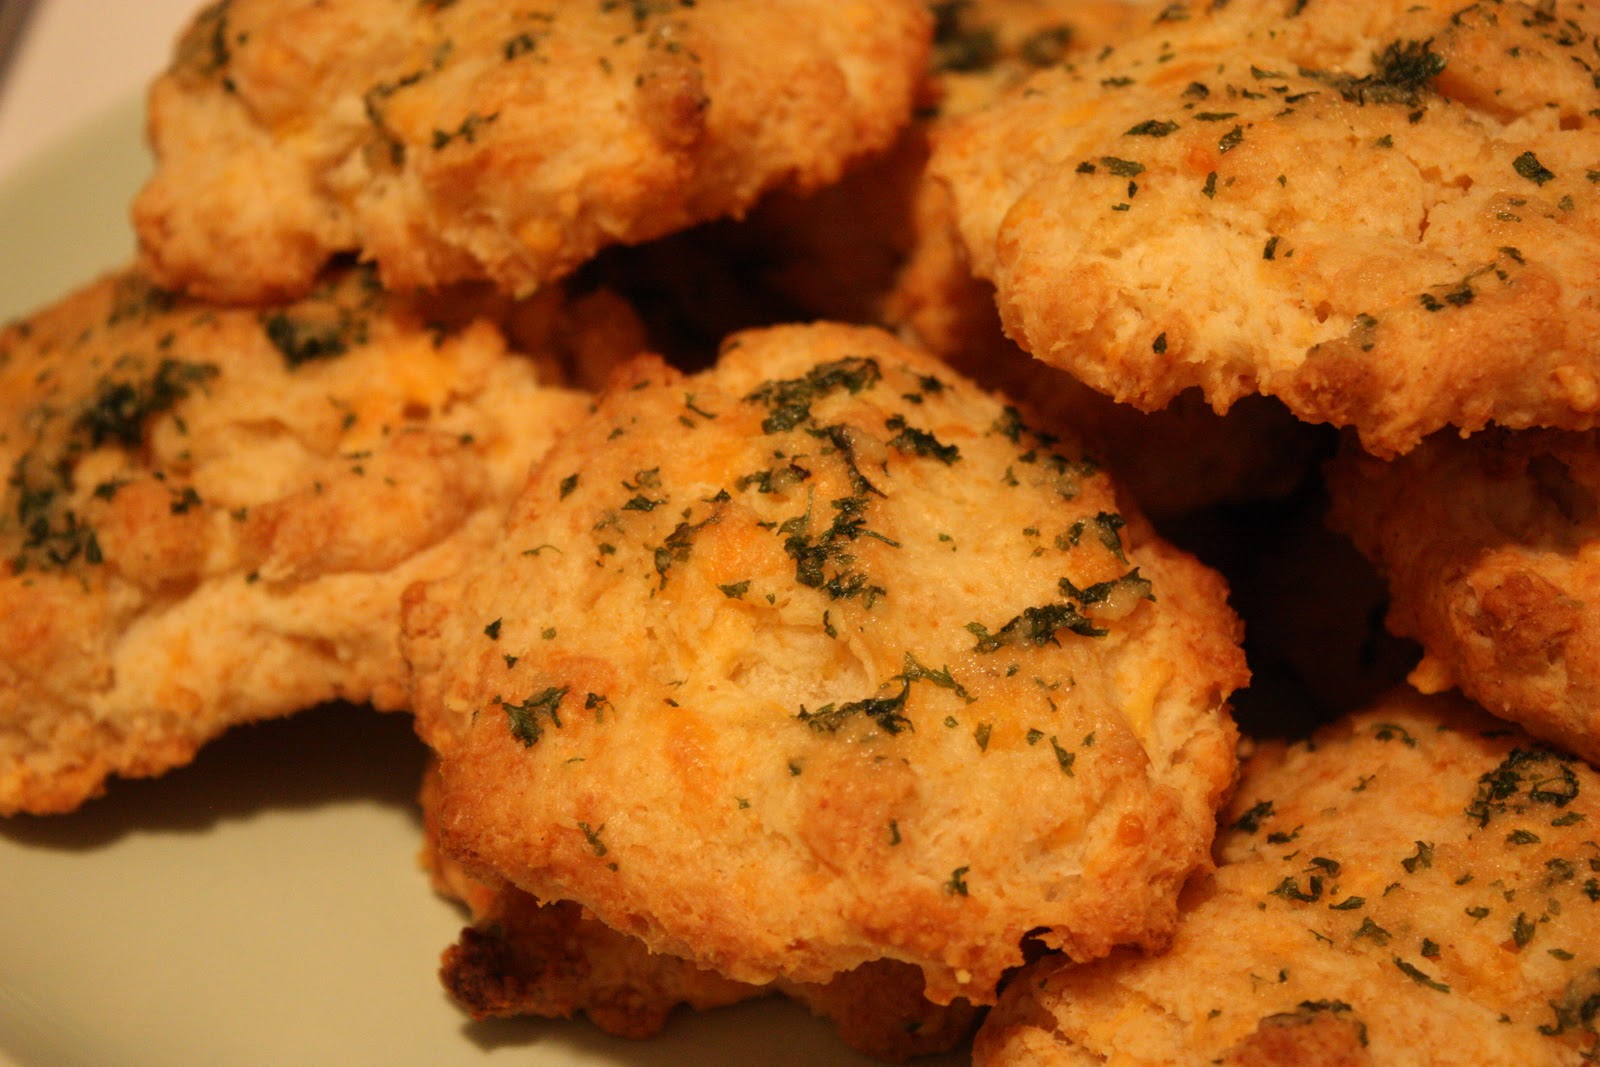
My Cheddar (not Bay) Biscuits and My (not Bisquick) Biscuit Mix


So, I'm pregnant, and being so I get cravings. Frequently this time around, and a couple of weeks ago all I wanted were the Red Lobster Cheddar Bay biscuits. I'd been down this road before, and I've tried many of the online versions only to be disappointed, so at least I knew what not to do.

I pulled out the standard ingredients, including biscuit mix, only I didn't have any biscuit mix. Dun dun dun.

Panic like whoa.

See, I live in a small town. We have 2 restaurants that are really more like diners (and one of them only sells chicken wings, but there's a third going in now, woot!). To actually get to a red lobster is a 30 minute drive each way, and I was already in my pajamas (something I tend to get into 0.34 seconds after getting home from work). So, my only option was to make the biscuits from scratch. Or go to the grocery store (please recall pajama statement above).

So, I started hunting online for a biscuit recipe, but instead of finding a biscuit recipe, I found a biscuit mix recipe, and it ended up being awesome! I would link it, but I can't remember where it was, and I forgot to favorite the page. I'll try to figure this out later though, because they deserve all the credit!

Enjoy! I have 3 times since I figured this out (please remember I'm pregnant), and now because I'm typing it out, I'm pretty sure they just got added to the menu tonight. I'm sure they'll work with Asian marinated pork tenderloins!

Cheddar (not Bay) Biscuits

Prep Time: 10 minutes
Bake Time: 17 minutes
Makes: 12 large biscuits

Ingredients:

Biscuits:
2½ c biscuit mix
4 tbsp butter, straight from the fridge cold
¾ c whole milk, cold
½ tsp garlic powder
1 heaping cup grated medium cheddar cheese

Topping:
4 tbsp butter, melted
½ tsp dried parsley flakes
1 tsp garlic powder
¼ tsp salt

Directions:


1. Preheat your oven to 400°F and line two baking sheets with parchment paper.

2. Combine the biscuit mix, butter and cheese with a pastry blender (or cut in with a couple of knifes or forks, I highly recommend getting a pastry blender though!). You want the butter to be in pea sized pieces mixed with the flour.


3. Gently stir in the milk and garlic powder. Don't over mix this or the biscuits won't be fluffy

4. Use a ½ cup measuring cup to scoop up the mix and place onto the prepared baking sheet (you're hands will get a little messy here.


5. Bake for 15 - 17 minutes, until the tops of the biscuits begin to turn a light brown

6. While the biscuits are baking, mix all the topping ingredients together. As soon as the biscuits come out of the oven, use a pastry brush to brush the topping onto the top of each biscuit. Don't be shy here!

NOTE: You can also make smaller, ¼ cup sized biscuits. Just decrease the time in the oven by a few minutes and keep your eye on them. I like the big ones because then I say that I only ate 2 (or 3, or 4) of them, instead of 4 (or 6, or 8).


Pantry Biscuit Mix

This is fantastic because you just store it in a large airtight container in a cool, dry place, or the freezer, for up to 8 months! I found this mix to make biscuits far superior to the store-bought brand...but that's just my humble opinion.

Prep Time: 5 minutes
Makes: 11 cups of mix

Ingredients:


9 c all purpose flour
¼ c baking powder
1 tbsp salt
2 c shortening

Directions:


1. Add all ingredients to a food processor and pulse until the mixture resembles course crumbs. Store until needed.

Nan's Buttertarts

Buttertarts


This is my great-grandmothers recipe for buttertarts, and it's so simple that I almost feel like they can't possibly be as good as they are. And they are good. I'm currently trying to find a fair to enter them in (because yeah, on my bucket list, right next to making it into the Guiness Book of World Records for anything, is to win a blue ribbon at a country fair. I think these are my ticket).

I made these a week and a half ago, and I know that I've got at least one more pack of frozen tart shells in my freezer, so it's been a battle of the wills to not make at least another dozen. Can this (with it's butter and milk) count as a serving of dairy? Half a serving?

Oh yeah, these are definitely Oliver approved too!

Without further ado...

Prep Time: 10 minutes
Bake Time: 28 minutes
Makes: 24 tarts (standard size)

Ingredients:


2/3 c butter, softened
2 c brown sugar
2 eggs
4 tbsp milk
2 tsp vanilla
walnut pieces (optional)

Directions:

1. Preheat your oven to 450°F and prepare your tart shells.


2. Cream together the butter and sugar until light and fluffy


3. Add the eggs, milk and vanilla and mix until well combined.


4. Drop a few nuts (if using) into the bottom of your prepared tart shells (or your tenderflake ones from the freezer, like I do). Fill each shell with 1 tbsp of filling


5. Bake at 450°F for 8 minutes, then reduce the oven temperature to 350°F (do not remove the tarts) and continue baking for another 15 to 20 minutes, until golden brown.


NOTE: At 15 minutes, your filling will be runny, at 20 minutes it will be firm. I'm a firm filling person (as were the folks here at the office, who have been harassing me all week to bring in more), so I strongly suggest going that route.